VikraTech Solutions

How to Set Up Your Webmail on Outlook for Desktop (Auto-Config)

A Simple Guide

How to Set Up Your Webmail on Outlook for Desktop (Auto-Config)

A Simple Guide

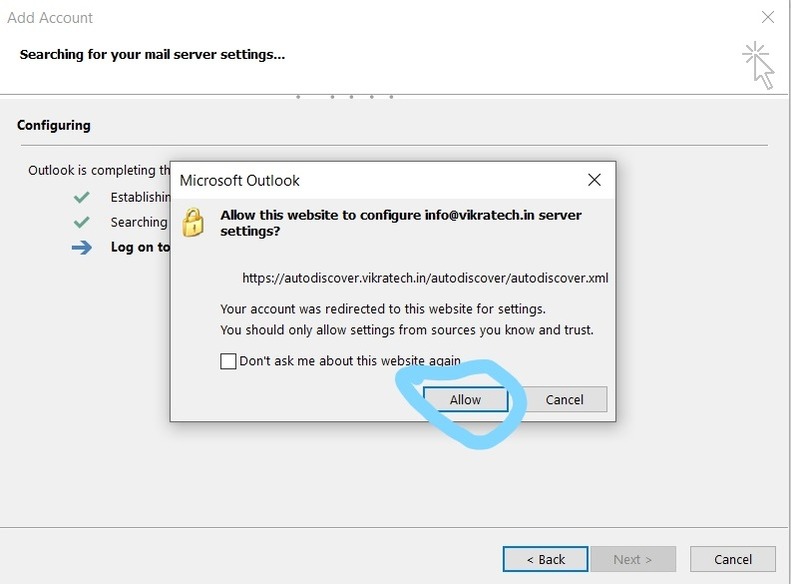
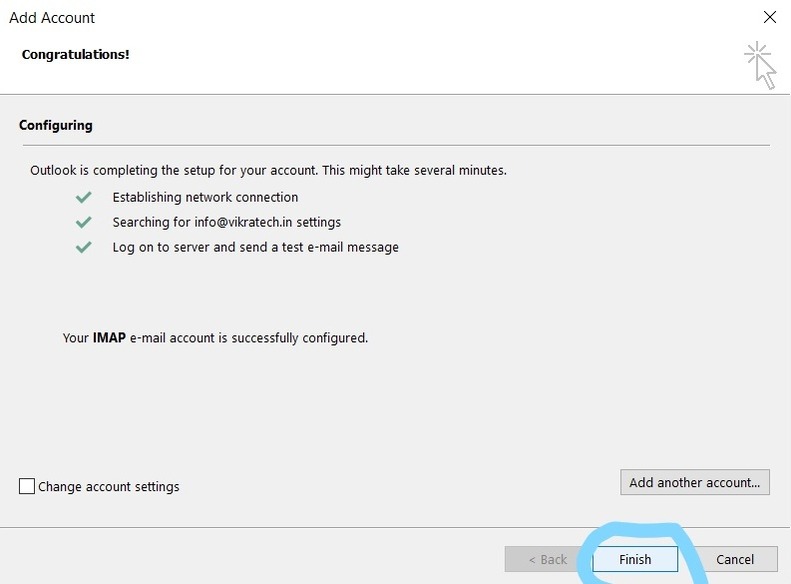
Setting up your webmail on Outlook for desktop can streamline your email management process, allowing you to access all your emails in one convenient location. In this guide, we’ll walk you through the process of configuring your webmail on Outlook using the auto-config feature, making the setup process quick and hassle-free.

Step 1: Open Outlook

Begin by launching the Outlook application on your desktop computer. You can usually find the Outlook icon in your taskbar or by searching for it in the Start menu.

Step 2: Go to File

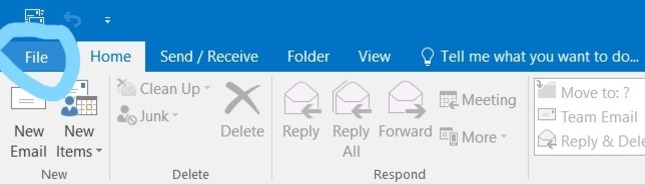
Once Outlook is open, navigate to the “File” tab located in the top-left corner of the screen. Click on it to access the File menu.

Step 3: Click on Add Account

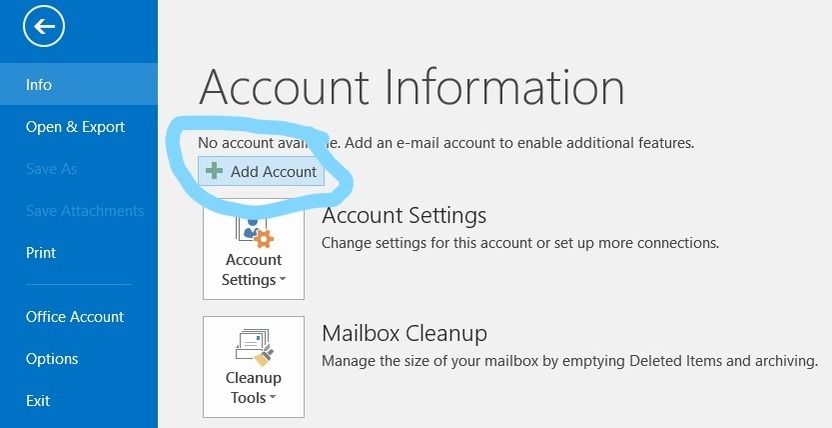
In the File menu, select the option labeled “Add Account.” This will initiate the process of adding a new email account to Outlook.
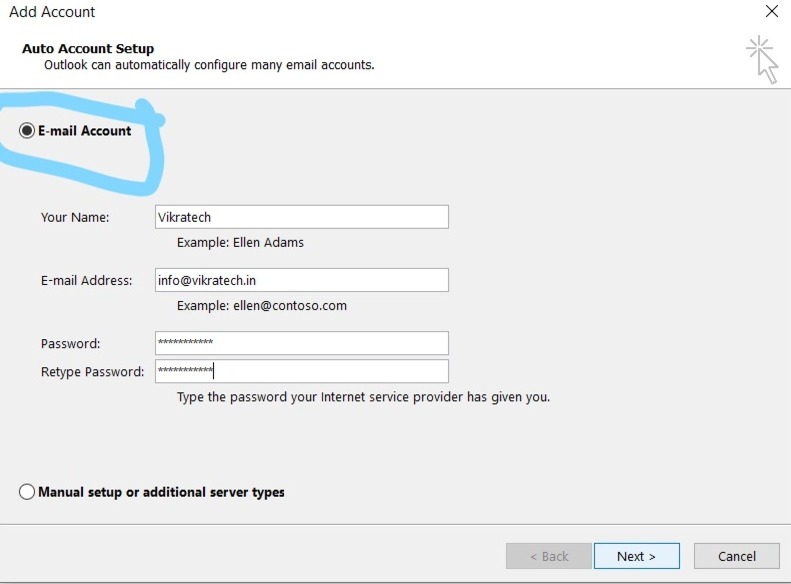
Step 4: Select Email Account and Enter Your Credentials
Choose the “Email Account” option from the list and proceed to enter your webmail credentials, including your email address and password. Once done, click “Next” to continue.
Step 5: Auto-Configuration
Outlook will attempt to configure your webmail account automatically. This process may take a few moments as Outlook retrieves the necessary server settings.
Step 6: Click on Allow
If prompted, click on “Allow” to grant Outlook permission to configure the server settings for your webmail account. This step ensures that your account is properly set up within Outlook.
Step 7: Confirmation
Once the auto-configuration process is complete, Outlook will display a confirmation message indicating that your IMAP email account has been successfully configured.
Step 8: Add Another Account (Optional)
If you have additional webmail accounts to add, you can do so by clicking on “Add Another Account” and following the same steps outlined above.
Step 9: Click on Finish
Once you have added all your desired accounts, click on “Finish” to complete the setup process.
Step 10: Your Webmail is Now Configured on Outlook
Congratulations! Your webmail accounts are now configured and ready to use within Outlook. You can access all your emails directly from the Outlook application on your desktop.

By following these simple steps, you can effortlessly set up your webmail accounts on Outlook for desktop using the auto-config feature. Enjoy the convenience of managing all your emails in one centralized location!

Related Posts

  • All Posts
  • Uncategorized
Load More

End of Content.